Can a Professional Fix Leather After a Failed DIY Kit or Adhesive Patch?
Very few pieces are ruined by a failed attempt. What a bad repair costs you is the removal stage, and how expensive that is depends entirely on what was used.
Quick answer
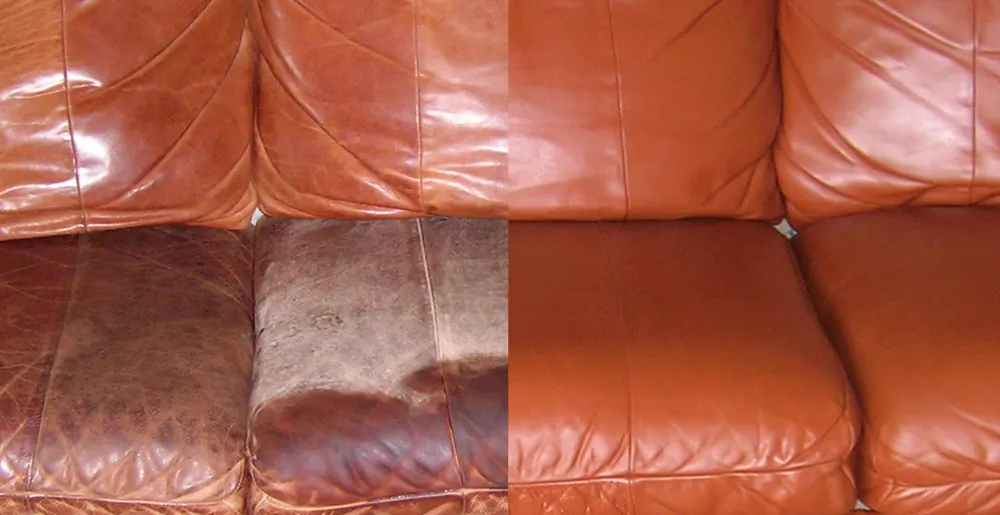
Almost always, yes. A professional repair over a failed attempt starts with removal: taking off rubbery filler, lifting excess pigment, cleaning out adhesive, and taking the surrounding area back far enough that a rebuilt finish blends. That preparation is skilled work and it is what makes the job cost more than the original repair would have. The materials that cause real trouble are superglue, silicone dressings and anything solvent-heavy that soaked into the hide.
At a glance
| Easy to reverse | Excess pigment, thin filler, leather repair tape on the underside |
|---|---|
| Harder | Thick rigid filler, hand stitching, adhesive residue on the face |
| Hardest | Cured superglue, silicone dressings, solvent-saturated hide |
| What it costs | The removal stage — the repair itself is unchanged |
| Most important thing | Tell the specialist exactly what was used, including years ago |
Why failed repairs are usually recoverable
The starting assumption should be optimistic. Leather is a durable material and most consumer products sit on top of it rather than destroying it.
A professional repair rebuilds a surface: clean and degrease, stabilize, back the void, fill in thin flexible layers, press matching grain, spray and feather color, seal. Every one of those stages can be performed on an area that has been worked on before, provided the previous work can be removed first.
That removal is the difference. On a fresh repair the surface is prepared and the work starts. On a failed one, there is an extra stage — sometimes a long one — before anything can be built.
So the honest framing is not whether it can be fixed, but how much the removal adds. For most failed kit repairs the answer is modest. For a few specific materials it is substantial.
What typically goes wrong with a kit repair
The failures are consistent enough to be predictable, which helps a specialist know what they are dealing with.
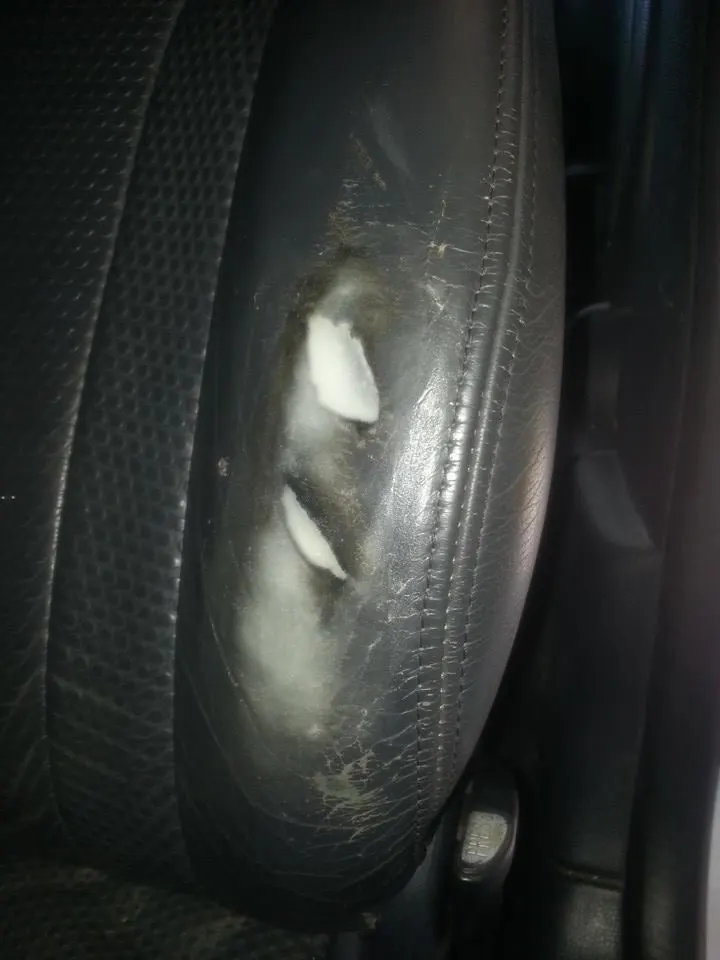
The most common is a repair that cracked around its border. Filler applied in one thick layer behaves like a rigid insert in a flexible panel, so the first heavy sit splits it at the edge. The repair itself may be intact; the ring around it is not.
The second is color mismatch. A single mixed pigment matched by eye reads close in daylight and obviously wrong under a lamp, because most leather finishes are built from more than one layer.
The third is a smooth patch in a grained panel. Texture matching is the stage most often skipped, and it is what makes an otherwise decent repair visible from across the room.
The fourth is lifting. Filler applied over body oil, furniture polish or a silicone dressing releases within weeks or months, usually starting at one edge.
The fifth is an over-wide halo, where a repair was blended by brush rather than sprayed, leaving a ring of slightly different color and sheen.
The materials that are straightforward to remove
Good news first, because this covers most cases.
Excess pigment from a color kit generally comes off with the right preparation products. It sits on the finish, and lifting it is a cleaning-and-keying operation rather than a rescue.
Thin flexible filler, properly cured, can usually be leveled or taken back without damaging the hide.
Leather repair tape applied to the underside of a tear is close to ideal from a specialist's point of view — it stabilized the damage without touching the visible surface, which is exactly what a temporary fix should do.
A colored wax or cream that was rubbed in comes off with cleaning, though it may take several passes.
In all of these, the additional cost over a fresh repair is real but modest, and the final result is the same as if nothing had been attempted.
The materials that cause real trouble
Four things make a specialist's day longer, and it is worth knowing which you are dealing with.
Cured cyanoacrylate — superglue — is the most common and the most difficult. It is rigid, it penetrates the fiber structure rather than sitting on it, and it cannot simply be peeled away. It leaves a hard, shiny area that will not accept filler or color. Removing it without damaging the hide is slow, skilled work, and occasionally the affected leather has to be cut out and rebuilt instead.
Silicone dressings are the quiet one. They do not look like a repair at all, but silicone repels the water-based systems used in professional refinishing, and it migrates into the surface over time. A panel that has been dressed for years needs thorough decontamination before anything will bond.
Solvent-saturated hide, usually from nail polish remover, acetone or repeated alcohol use, is damaged rather than coated. The finish is gone and the hide may be affected, so there is less sound material to build on.
Adhesive residue from duct tape or packing tape contaminates the surface, and pulling the tape off frequently takes finish — sometimes grain — with it, leaving a rectangle of missing surface around the original damage.
Hand stitching and glued seams
These deserve their own section because they are common and because the fix is not obvious.
A tear that has been sewn closed by hand has new holes in leather that was already stressed, and the stitching usually pulls the edges into a pucker. Before the area can be rebuilt, the stitching has to come out and the puckering released, and the extra holes then have to be filled along with the original tear.
A seam that has been glued rather than restitched is worse in one specific way: adhesive in the seam prevents proper sewing. It has to be cleaned out of the channel before a needle can go through it cleanly, and the two edges are frequently held in a slightly wrong alignment that has to be released first.
Neither is fatal. Both add time, and both are avoidable — a split seam is a fast restitch if nothing has been done to it.
If you are waiting for an appointment on a split seam, the right holding measure is a smooth cover so nothing catches the edges, not adhesive.
How the removal actually works
Understanding the process explains why the cost sits where it does.
The area is assessed first to establish what was used, which is why an honest account from the owner is worth real money.
Loose or lifting material is taken off mechanically, carefully, without pulling at sound leather around it.
Bonded material is softened with the appropriate agent and worked off in stages. This is where product choice matters — the wrong solvent removes the old repair and the surrounding finish together, turning a small problem into a panel refinish.
The surrounding area is then taken back far enough that the new finish has a clean, feathered edge to blend into. This is why the finished repair often covers more area than the original damage: the boundary has to be somewhere the eye cannot find.
Finally the surface is degreased and keyed, and the normal repair sequence begins from a sound starting point.
What it costs compared with doing it right the first time
Nobody can quote this without seeing it, but the shape is predictable.
A failed color application usually adds a modest amount — cleaning and keying rather than a rescue.
A failed filler repair adds more, because the material has to come out and the area re-leveled.
Superglue, silicone or solvent damage can add substantially, and in the worst cases it turns a spot repair into a panel refinish because the surrounding area had to be taken back.
There is also a scope effect worth naming: a failed attempt is usually accompanied by the damage having grown, because the piece stayed in use while the repair was failing. So the job is often both a remediation and a larger repair than the original.
None of that means the attempt was unreasonable. It means the honest comparison is not repair cost versus kit cost, but repair cost versus repair cost plus removal.
The single most useful thing you can do
Tell the specialist exactly what was used. All of it, including things applied years ago and things you are slightly embarrassed about.
This is not a formality. Silicone, superglue, acetone and kitchen oils each require a different preparation, and discovering one of them halfway through a job means stopping, changing approach, and sometimes redoing work already done.
If you still have the product, photograph the label. If you do not remember the brand, describe what it looked like — a gel in a small tube, a thick paste in a pot, a liquid in a bottle with a sponge applicator. That is usually enough to identify the class of material.
Say when it was applied and how many times. A single application two years ago and monthly applications for five years are different problems.
Nobody is going to be judgmental about it. Specialists see failed attempts constantly, and knowing in advance is the difference between a smooth job and an unpleasant surprise for both sides.
The rare cases that are not worth fixing
Being straight about the exceptions.
Where solvent has destroyed the finish across a large area and reached the hide, there may be too little sound material to build on. The panel can sometimes be replaced; refinishing it may not hold.
Where superglue has been applied over a wide area rather than a spot, the removal cost can approach the value of the piece.
Where the underlying material is bonded leather that was already delaminating, no amount of remediation changes the fact that the coating is separating from its backing everywhere.
And where the original problem was structural — a failing frame, collapsed foam — the surface work was never going to be the answer, failed attempt or not.
In all of those, an honest assessment says so rather than quoting for work that will disappoint.
What to send for an assessment
Photograph the failed repair square-on in daylight, close enough to see its edges clearly.
Take a second shot from a low raking angle across the surface, which shows whether the repair is proud of the surrounding leather, sunken, or cracked at its border.
Photograph an undamaged area of the same leather for color and texture reference.
Photograph the product label if you still have it.
Then write down, honestly and completely, what was used and when. That single paragraph does more to determine an accurate quote than any of the photographs, because it tells the specialist which removal stage they are looking at.
Questions we get asked next
- I used superglue on a tear. Is the sofa ruined?
- Almost certainly not ruined, but the job is now larger. Cured superglue has to be removed or worked around before filler and color will bond, and that is slow, careful work. Say exactly where it was applied so it can be planned for rather than discovered.
- Can a bad repair be covered over rather than removed?
- Not reliably. Anything applied over a failed repair inherits its problems — a cracked border keeps cracking, and unbonded filler keeps lifting with whatever is on top of it. Removal is what makes the new work durable, which is exactly why it is included rather than skipped.
- The kit repair looks fine. Should I have it redone anyway?
- No. If it is level, textured, color-matched and has not cracked at its edges after several months of use, it is doing its job. Leave it alone and spend the money on something that needs it.
- Will the specialist charge me more for a failed attempt?
- The removal stage is real work, so it usually costs more than an equivalent fresh repair. A good specialist will explain what the extra covers rather than presenting one number, and that explanation is a reasonable thing to ask for.
- failed repair
- DIY
- remediation