Can Motorhome Dashboards, Consoles and Interior Trim Be Restored?
The dash of a coach takes more sun than any surface in the vehicle, and it is one of the first things you look at from the driver's seat.
Quick answer
Most of it, yes, and the answer depends on which failure you have. Faded and dull surfaces recolor well. Sticky, degrading soft-touch coatings can be stripped and refinished. Small cracks can be filled, textured and recolored. What does not repair durably is a dash that has cracked over collapsed or shrunken foam beneath, because the surface has nothing stable to sit on — that needs a cap or a replacement panel.
At a glance
| Worst exposure | A very large windshield with the dash directly beneath it |
|---|---|
| Fading and dullness | Recolors well and evenly |
| Sticky surfaces | Strip the failed coating and refinish |
| Cracks over sound foam | Fill, texture and recolor |
| Cracks over collapsed foam | Needs a cap or replacement, not surface work |
Why a coach dash takes more than a car dash
The exposure is genuinely in a different class, and it explains why coach dashes fail early.
A motorhome windshield is enormous — often several times the glass area of a car — and largely unshaded by any overhang.
The dash sits directly beneath all of it, taking sun for most of the day whether the coach is moving or parked.
Surface temperatures on a dark dash behind that much glass in a Texas summer are extreme, and heat is what drives the degradation of coatings, adhesives and the foam beneath.
Coaches also spend long periods parked in the open, which is where most of the damage accumulates.
And the dash area of a coach is larger and flatter than a car's, so more of it lies horizontal and takes the sun square-on rather than at an angle.
The four failures and how to tell them apart
Different problems that look related and need different work.
Fading and dullness: the color has lost depth and the surface looks chalky or washed out, with no physical damage. This is UV degradation of the pigment and the coating.
Sticky or tacky surfaces: a soft-touch coating has broken down and turned gummy, picking up dust and marking with every touch. This is a coating failure and it gets worse, never better.
Cracking: splits in the surface, usually starting at the areas that get the most sun and spreading. What matters is what is underneath.
Warping or lifting: a panel that has distorted or a covering separating from the substrate, which is heat and adhesive failure.
The test that separates repairable cracking from the rest is pressing beside a crack. If the surface is firm and supported, the foam beneath is sound. If it gives, dips or feels hollow, the foam has collapsed and surface work will not hold.
Faded and dull surfaces
This is the most satisfying of the four and the most reliably fixed.
The surface is cleaned thoroughly and every trace of old dressing removed. Coaches have usually had years of protectant products applied, and silicone-based ones in particular leave a film that nothing bonds to.
The surface is prepared so the new coating has something to key into.
Color is matched to the coach as it is now, not to the original specification, since everything around it has aged too.
It goes on in thin coats and is sealed with a flexible topcoat carrying UV protection — which is the layer that stops the same fading happening again.
The finish sheen is chosen deliberately. A dash should be low-sheen: a glossy dash reflects into a large windshield and is genuinely distracting to drive behind, which matters more in a coach than in a car.
Done across the whole dash rather than in patches, the result is uniform, because these surfaces take color evenly.
Sticky soft-touch surfaces
This is the failure owners find most unpleasant and it is very common on coaches of a certain age.
Many dashes, consoles and door pulls are finished with a soft-touch coating — a thin rubberized layer that feels pleasant when new.
That coating breaks down with heat, UV and time, and the breakdown product is tacky. It picks up dust, it marks with fingerprints, and it transfers onto hands and clothing.
Nothing applied on top fixes it. Cleaning makes it temporarily less dusty and it is still degrading.
The repair is to remove the failed coating entirely, back to the substrate, then prepare that surface and refinish it with a durable coating in a matched color and sheen.
It is more labor than recoloring because the stripping stage is thorough work, and the result is a surface that is genuinely fixed rather than managed.
Doing it on the whole panel rather than the sticky part is necessary, since the rest of the coating is going the same way.
Cracks, and the question of what is underneath
This is where the honest assessment happens and it is worth doing before any money is spent.
A dash is typically a rigid substrate, a foam layer, and a vinyl or coated skin. Cracks appear in the skin when it has hardened and the layers underneath have moved.
Where the foam beneath is still sound, a crack can be opened slightly, backed, filled in thin flexible layers, texture-matched and recolored. On a small number of cracks this works well and lasts.
Where the foam has collapsed, shrunk or gone brittle — which is common on older coaches — the surface has nothing stable to sit on. Filling produces a repair that cracks again along its edge, and often produces new cracks nearby as the panel continues to move.
The test is pressure. Press firmly beside each crack. Firm and supported means repairable; soft, hollow or dipping means it is not.
Widespread cracking across a dash is almost always the second case, whatever the individual cracks look like.
Where that is the situation, a dash cap fitted over the existing dash, or a replacement panel, is the durable answer — and saying so is more useful than taking the filling job.
The other trim in a coach
The dash gets the attention and there is a lot of other surface work in a motorhome.
Console lids and armrest tops, which take skin oil and wear rather than sun.
Door panel uppers and pulls, which are often the same soft-touch material as the dash and fail the same way.
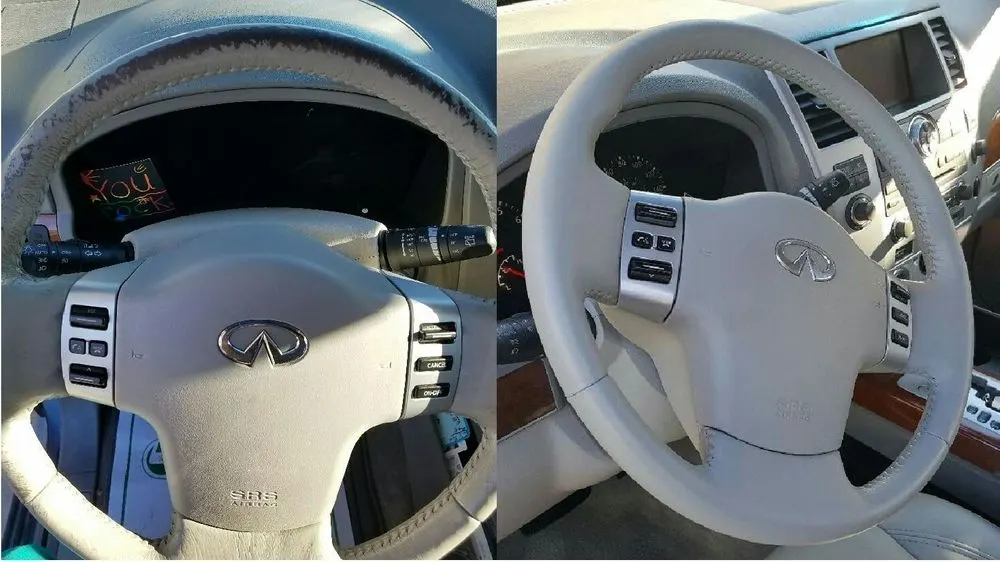
Steering wheels, which go shiny and sticky from hands and heat and which restore very well.
Window sills and cabinet faces near the windows, which fade badly on the sunny side of a coach and can be recolored to match the shaded side.
Interior wall panels and valances, which are usually a different material and a different trade.
Doing these in the same visit as the dash is far more efficient than separately, since preparation and color mixing are largely shared.
Working inside the coach
The practical side is straightforward with a few conditions.
It happens in place. Dash and trim work does not require removing panels in most cases.
Ventilation is important — a coach is a small enclosed space, so windows, the door and roof vents open, and fans where available.
Temperature matters. A coach that has been closed up in August is a poor working environment and it affects how coatings flow and cure, so a shaded spot or a cooled coach gives a better result.
Masking is a significant part of the job on a dash, because there are gauges, screens, vents, switches and glass all around the working area.
And the cure period before the surface is touched or driven depends on the products and the day's conditions, which a specialist confirms at the end rather than promising up front.
Preventing the next round
For a coach dash, prevention is unusually effective because the cause is so concentrated.
A reflective windshield cover whenever the coach is parked. This is the single highest-value item by a wide margin — it protects the dash, the captain's chairs and everything else in the cab at once.
Blinds or covers on the cab side windows.
Covered or indoor storage where possible, which removes the exposure entirely.
A neutral cleaner rather than household wipes and all-purpose sprays, which strip finishes over time.
Avoid heavy silicone dressings. They leave a glossy film that reflects into the windshield, they attract dust, and they complicate any future refinishing.
A light protectant with UV filtering, buffed off rather than left shiny, is the useful version of that habit.
What a dash cap involves
Where the assessment comes back as cracking over collapsed foam, a dash cap is usually the recommendation, and it is worth knowing what that means.
A cap is a molded overlay that fits over the existing dash rather than replacing it. The original stays in place and the cap bonds on top, covering the cracked surface entirely.
For common chassis this is a straightforward and durable answer, and it costs considerably less than a replacement dash assembly.
The considerations are fit and finish. A cap made for the specific chassis and year fits properly around the vents, gauges and windshield edge. A generic one does not, and the gaps show.
Color and sheen have to be matched to the rest of the cab, and a cap can be refinished to match rather than accepting whatever color it arrives in — which is often the difference between a repair that looks factory and one that looks added on.
Availability is the practical constraint. Caps for common van and truck chassis are readily available; for a less common coach the lead time can be significant, which is why this decision should be made early when there is a trip in the calendar.
The alternative on a rarer coach is a custom-made cover or a full retrim of the dash surface, both of which are more labor and both of which are legitimate where a cap does not exist.
What to send for an assessment
Photograph the whole dash from the driver's seat, and again from the passenger side, in daylight without flash.
Photograph each problem area close up and from a low raking angle, which shows texture and whether the surface is level.
Press firmly beside each crack and report whether it feels firm, or soft and hollow. This is the single most useful piece of information you can provide.
Say whether any surface is tacky to the touch, and whether it marks or transfers onto your fingers.
Photograph a shaded area of the same material for color comparison.
Say the coach's age, how it is stored, whether a windshield cover is used, and what has been applied to the surfaces over the years.
And say whether the console, door tops and steering wheel need attention too, since doing them together is considerably more efficient.
Questions we get asked next
- Can a cracked motorhome dash be repaired?
- It depends entirely on what is under the crack. Where the foam beneath is still sound, cracks can be filled, textured and recolored durably. Where the foam has collapsed or shrunk, the surface has nothing stable to sit on and a dash cap or replacement panel is the honest answer.
- My dash is sticky. Will cleaning fix it?
- No. Stickiness is a soft-touch coating breaking down, and the breakdown continues regardless of cleaning. The repair is to strip the failed coating back to the substrate and refinish it, which is more labor than recoloring and produces a surface that is genuinely fixed.
- Will a refinished dash reflect into the windshield?
- Not if the sheen is chosen properly. A dash should be finished low-sheen precisely because a coach windshield is so large that a glossy dash reflects into the driver's view. It is worth confirming the sheen before the work rather than after.
- What is the most effective thing I can do to prevent this?
- Use a reflective windshield cover every time the coach is parked. The dash sits under an enormous area of glass, heat and UV are what destroy it, and a cover removes most of both — while also protecting the captain's chairs and everything else in the cab.
- RV
- dashboard
- trim restoration