How Is Factory Car-Interior Color Matched on an Older Vehicle?
Manufacturers publish interior color codes. On a vehicle old enough to need repair, that code describes a color your car no longer is.
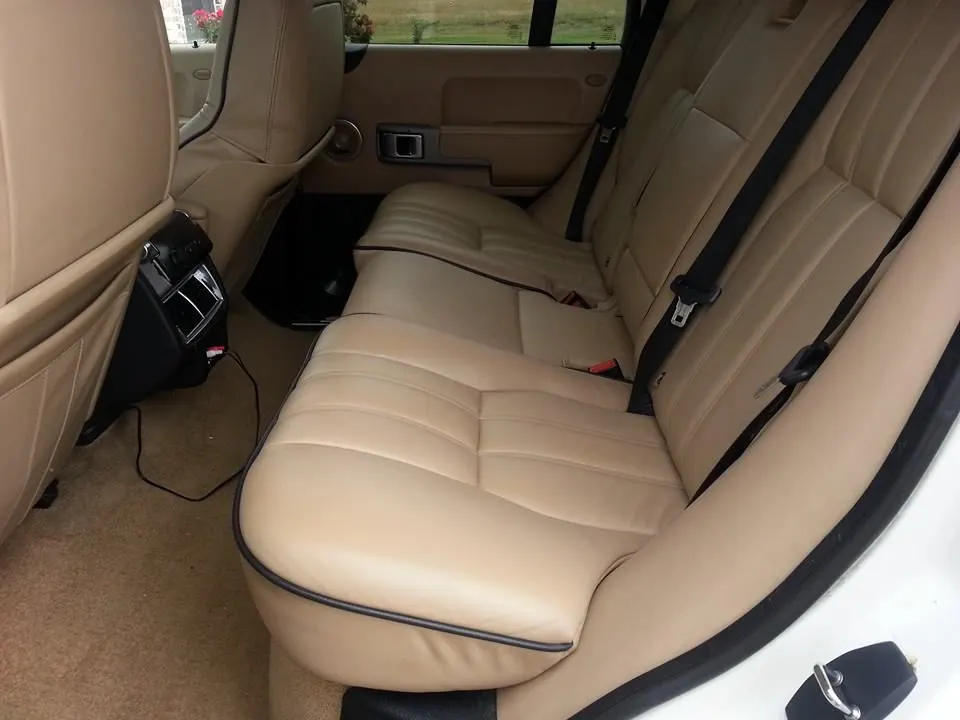
Quick answer
By mixing against the vehicle rather than from the factory code. The code tells you what the interior was when it left the plant; UV, heat and body oil have shifted it since, and different panels have shifted by different amounts. So a match is built against the actual panel being repaired, tested on a hidden area, and checked in daylight and under artificial light before any visible surface is touched.
At a glance
| Factory code | A useful starting point and never the final answer on an aged interior |
|---|---|
| Why it drifts | UV, heat and body oil shift the color unevenly across panels |
| Match against | The actual panel, with a test on a hidden area, checked in two lights |
| Hidden reference | Under the seat, behind the backrest, the underside of a console lid |
| Common mistake | Matching to a faded panel and locking the fading in permanently |
Why the factory code is not enough
Every manufacturer assigns interior trim codes, and they are genuinely useful — they tell you the original color family, the material, and often the specific finish system used.
But a code describes a vehicle as built. A car that needs interior repair is usually five to fifteen years old, and in that time three things have changed the color.
UV has degraded the pigment. Not evenly — the panels facing the glass have lost more than the ones in shade, and different pigments in the mix degrade at different rates, so the color has shifted in hue rather than simply lightening.
Heat has driven plasticizers and oils to the surface and away, which changes how the finish reflects light.
And body oil has darkened the areas people touch, so a driver's seat is frequently a different shade from the passenger seat in the same car.
The practical result: a repair sprayed in factory code color on an eight-year-old seat looks obviously new against everything around it.
How a match is actually built
The process is mixing against the vehicle, and it happens on site rather than in advance.
The panel to be repaired is cleaned first. Matching against a soiled surface produces a color that is too dark, and it is a genuinely common error — the panel comes up a shade lighter once it is clean and the match is then wrong.
A base is mixed to the general shade, then adjusted by eye against the surrounding leather in the light the vehicle is standing in.
It is tested on a hidden area — under the seat, behind the backrest, the underside of a console lid — and allowed to dry fully. Wet color reads noticeably darker than dry color, so approving a wet test produces a match that is too light.
The dry test is then checked in daylight and again under artificial light. Different sources emphasize different parts of the spectrum, and a match that works in one can be visibly off in the other.
Only when the test reads correctly in both does the visible work begin.
Finding a true reference on the vehicle
The most useful thing a specialist looks for is a piece of the original interior that has been protected from everything.
Under the seat cushion, where a section of material is tucked out of the light and out of contact.
Behind the backrest, on the section that faces the rear.
The underside of a console lid or an armrest.
Inside the seat back pocket, or the material at the very bottom of a door panel below the trim line.
Those areas are close to the original factory color, and comparing one against the exposed surface shows exactly how far the interior has drifted.
That comparison drives the decision that follows: whether to match the current aged color, or bring the panel back toward the original and blend more widely.
Matching to aged versus restoring to original
This is a real decision rather than a technicality, and it should be discussed rather than assumed.
Matching to the current aged color means the repair disappears into the interior as it is today. It is the cheaper option and it is correct when the interior is otherwise even and the owner is keeping the vehicle as-is.
The drawback is that it locks the aging in. If any other panel is later cleaned or refinished, the matched repair becomes the odd one out.
Restoring toward the original color means bringing the repaired panel back up and blending into its neighbors so there is no boundary. On a vehicle where the fading is uneven, that blend can extend across several panels.
For a vehicle being sold, restoring is usually the better spend, because it lifts the whole interior rather than concealing one repair.
For a daily driver being kept for a couple more years, matching to current is often the sensible call.
A specialist should lay out both rather than choosing for you.
Why different panels need different answers
An older interior is rarely one color, and treating it as one produces visible results.
The driver's seat is typically darkened by body oil and worn lighter at the contact points — two opposite shifts on the same seat.
The passenger seat, used less, sits closer to original.
The tops of the rear seat backs and the front seat shoulders have faded most, because they face the glass.
Door panel tops fade; door panel bottoms do not.
The console gets hand contact and sun.
So a job covering several panels involves either several matches or a decision to bring everything to one shade. The second is usually better on a vehicle being sold and more expensive on one being kept.
Two-tone and patterned interiors
Many vehicles use more than one color, and each has to be handled on its own terms.
Two-tone interiors with a light seating surface and dark bolsters need both matched separately, plus attention to the boundary between them. A repair crossing that line is two repairs meeting.
Contrast stitching is a detail that gets overlooked. If a repair runs alongside stitching, the thread color has to be considered when masking, and overspray onto contrast stitching is a visible mistake.
Perforated panels have a color that reads differently from solid panels, because the holes affect how the surface reflects light. Matching a solid area to a perforated one by eye leads people astray.
Quilted and patterned surfaces have varying light behavior across the pattern, so the match is checked at more than one point.
None of these are obstacles. They are reasons the assessment should include the whole area rather than only the damage.
Where automotive matching differs from furniture
The techniques overlap, and three things are specific to vehicles.
The finish system is different. Automotive leather carries a harder, thicker, more heat-resistant topcoat than furniture leather, and the color has to go under a topcoat with those properties rather than a furniture one.
The lighting environment is unusual. A car interior is viewed in daylight through glass, in shade, and under interior lighting at night, and it is a small enclosed space where surfaces reflect onto each other. A match has to hold across all of that.
The aging is more extreme. Furniture in a conditioned room drifts slowly; a vehicle interior in this climate cycles daily between comfortable and extreme, so the drift from factory color is larger at any given age.
The practical consequence is that automotive matching relies more on the test-and-check process and less on any recorded formula.
The Texas factor
Interiors in this region drift further from their factory color, and faster, than almost anywhere else in the country.
The sun season is long, the windshield delivers a heavy UV dose to the dash and the front seat tops, and cabin temperatures in a parked car run far above ambient for months.
So the gap between the factory code and the current reality is wider here at five years than it might be at ten elsewhere.
It also means light interiors — chosen deliberately here because they stay cooler — show the drift differently: they tend to yellow and to pick up body-oil darkening rather than losing depth the way dark interiors do.
For matching, the implication is straightforward: the older the vehicle and the more sun it has had, the more the match depends on testing on the car and the less any recorded color helps.
What you can check on a finished job
Knowing what good looks like makes it possible to judge the work rather than take it on trust.
Look at the repaired panel in daylight with the door open, then again at night with the interior lights on. A correct match reads the same in both.
Look at it from a low angle across the surface rather than straight on. Boundaries and sheen differences show at an angle and hide head-on.
Compare the repaired seat with its opposite number. They will not be identical if one was more worn, but the repair should not stand out as newer than its own seat.
Run a hand across the repair. Texture should feel continuous, and the surface should not feel stiffer or slicker than the leather around it.
Then look again after a couple of weeks. Color that was slightly off but acceptable on the day tends to become more obvious rather than less, and it is easier to raise early.
What to send for an assessment
Photograph the damaged panel square-on with the door open, in daylight, no flash.
Photograph an undamaged area of the same panel from the same distance and angle.
Photograph a protected reference area if you can reach one — under the seat, behind the backrest, the underside of a console lid. That single image tells a specialist how far the interior has drifted.
Photograph the seat opposite for comparison, since the difference between driver and passenger sides is informative.
Say what the vehicle is — make, model, year and trim — and include the interior trim code if you can find it on the build sticker, usually in the door jamb or the glovebox. It is a starting point rather than an answer, but it is a useful one.
And say whether you want the repair matched to the interior as it is now or brought back toward original, since the two lead to different scopes and different quotes.
Questions we get asked next
- Can't you just order the factory color?
- You can order a color mixed to the factory code, and on a nearly new vehicle it may be right. On an older one it will be visibly newer than the surrounding panels, because UV, heat and body oil have shifted the interior since it was built. The code is where a match starts, not where it ends.
- Will the repaired panel match perfectly?
- On a pigmented automotive finish with the match built and tested on the vehicle, it should be undetectable in normal light and use. The things that make it harder are light two-tone interiors, perforated panels next to solid ones, and interiors where fading varies a lot between panels.
- My driver's seat is darker than the passenger seat. Which one gets matched?
- The one being repaired, unless you want both brought to a common shade. Body oil darkens the driver's seat and use lightens its contact points, so it genuinely is a different color. Matching a repair on it to the passenger seat would leave the repair looking wrong on its own seat.
- Can the whole interior be brought back to one color?
- Yes. Cleaning, stabilizing and recoloring across every panel produces an even interior and is a common step before selling a vehicle. It costs more than a spot repair and it is what makes an older interior read as maintained rather than repaired.
- color matching
- automotive
- restoration